
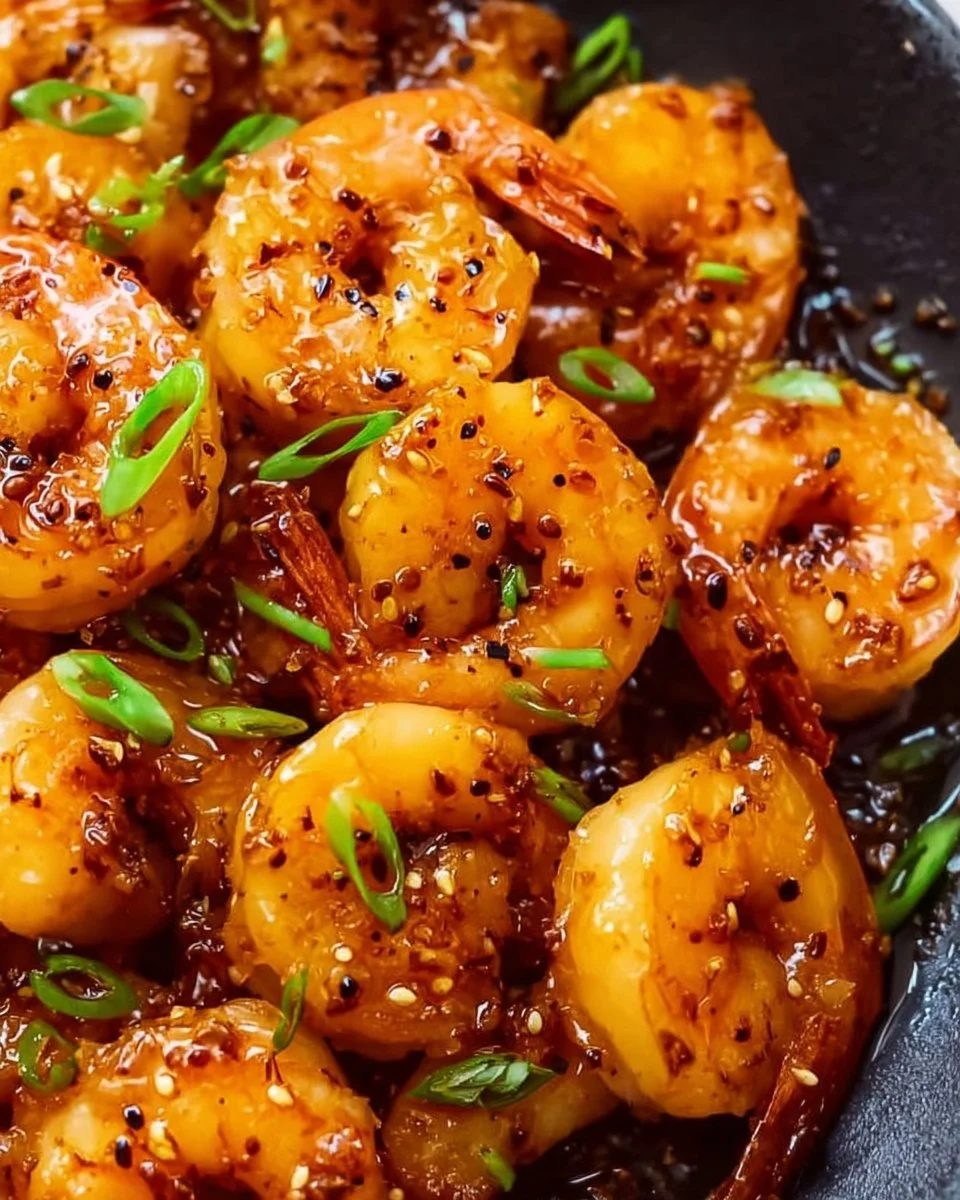
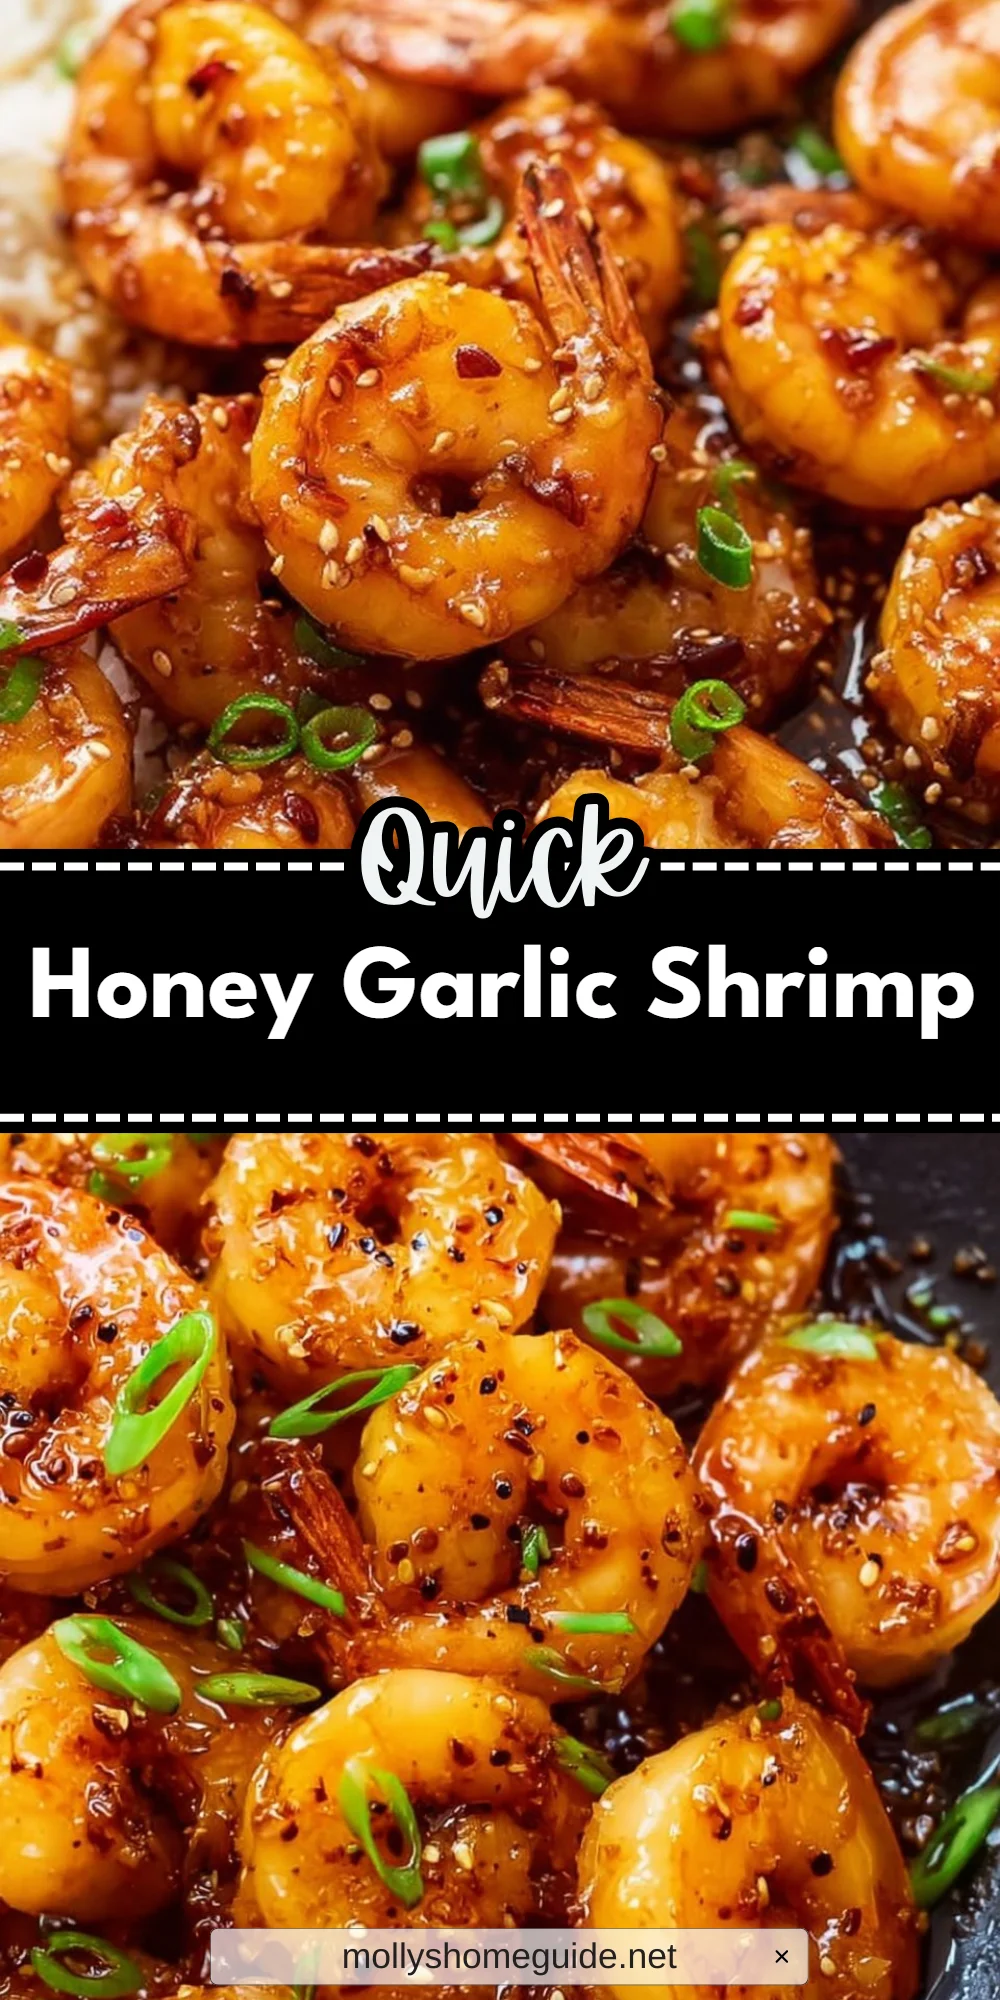
There’s something truly special about a dish that brings together bold flavors and comforting warmth, and that’s exactly what Honey Garlic Shrimp delivers. With its glossy, amber glaze and the mouthwatering aroma of garlic wafting through my kitchen, this dish is a feast for the senses. The juicy shrimp become enveloped in a deliciously sticky sauce that’s both sweet and savory, creating an experience that feels wonderfully indulgent. I often whip this up when I’m short on time but still want to impress—it’s become a staple in my kitchen!
The beauty of this dish is that it comes together surprisingly fast, making it perfect for busy weeknights or even casual gatherings when friends drop by. You can serve it over rice, toss it in a salad, or even enjoy it straight from the pan for a late-night treat. And if you have any leftovers (though I rarely do), they can easily be stored for a quick lunch the next day!
Why I Love Honey Garlic Shrimp
What’s not to love about Honey Garlic Shrimp? It hits that sweet spot between simplicity and elegance, proving that delicious meals don’t always require a long list of complicated steps. It’s incredibly easy and undeniably delicious, making it a true winner at my table. Whether I’m in a rush or feeling fancy, this dish never fails to impress.
Honey Garlic Shrimp Ingredients
The magic of this Honey Garlic Shrimp truly lies in its harmonious blend of ingredients that come together to create that tantalizing sauce. Don’t worry about exact measurements just yet; those are all in the recipe card for you!
Essential Components
- 1 POUND SHRIMP, PEELED AND DEVEINED: These little gems pack a mighty punch, offering a tender, juicy bite that perfectly absorbs the sauce’s flavors.
- 1/4 CUP HONEY: This is where the sweetness comes from, creating that lush glaze while balancing the savory notes.
- 1/4 CUP SOY SAUCE: Providing a salty depth, this ingredient rounds out the flavors and enhances the overall umami experience.
- 3 CLOVES GARLIC, MINCED: Fresh garlic infuses the dish with its aromatic goodness; it’s key to that beloved garlic punch.
- 2 TABLESPOONS OLIVE OIL: This helps with the cooking process, adding richness and facilitating that glorious sear on the shrimp.
- 1 TEASPOON SESAME OIL: Just a touch of this oil adds a nutty aroma, enriching the overall taste.
- 1/2 TEASPOON RED PEPPER FLAKES (OPTIONAL): For those who love a little heat, this is the perfect way to spice things up!
- GREEN ONIONS, SLICED (FOR GARNISH): Not only do these add a pop of freshness, but they also bring a vibrant color to the dish!
Substitutions and Tips
Need a swap? If you’re out of shrimp, you can easily use chicken breast cut into bite-sized pieces for a similar flavor with a different protein. For a vegan option, firm tofu works wonders! You can also swap out honey for maple syrup if you’re looking for a plant-based alternative, though it won’t be quite as rich. In a pinch, tamari can replace soy sauce for gluten-free needs.
Kitchen Tools You’ll Need
- Large skillet (12-inch or larger)
- Mixing bowl
- Measuring cups
- Sharp knife
- Cutting board
- Serving platter
How to Make Honey Garlic Shrimp
Let’s dive into creating this delicious Honey Garlic Shrimp. I’ve broken down the process into simple steps. Follow along, and you’ll have a wonderful meal in no time. We’re aiming for succulent shrimp enveloped in a glaze that’ll make your taste buds sing!
Mix the Sauce
First, in a mixing bowl, combine honey, soy sauce, minced garlic, olive oil, sesame oil, and red pepper flakes (if using). Give it a good stir until all the ingredients are well blended. This mixture is where all the magic happens, and you want it to be perfectly combined!
Sear the Shrimp
Next, heat your skillet over medium-high heat and toss in the shrimp. Spread them out evenly in the skillet—this step is key because it helps to sear them nicely. Cook the shrimp for about 1-2 minutes on each side until they turn a lovely shade of pink. Trust me, those brown edges add a delightful flavor!
Drizzle and Cook
Once the shrimp are looking good, pour that luscious honey garlic mixture over them. As you do this, give the shrimp a stir to make sure they’re all coated. Cook for an additional 2-3 minutes, ensuring the sauce thickens and clings beautifully to the shrimp. We’re aiming for a glossy finish!
Garnish and Serve
Finally, remove the skillet from the heat and sprinkle the sliced green onions on top for that fresh crunch. Serve immediately while it’s still warm—your family and friends will be fighting over the last bite!
How to Store Honey Garlic Shrimp
If you manage to have any leftovers (lucky you!), they store quite well! At room temperature, it’s best to consume them within 2 hours. For refrigeration, place the shrimp in an airtight container, and they’ll stay fresh for about 3-4 days. If you want to save them longer, freeze the shrimp for up to 2-3 months; just let them thaw in the refrigerator overnight before reheating. Reheat gently on the stovetop for the best results!
Tips for Success
- Don’t overcrowd the shrimp in the skillet—it’s crucial for that perfect sear!
- Use fresh garlic for the best flavor impact.
- Adjust the amount of red pepper flakes to your desired level of spice.
- Be careful not to overcook the shrimp; they cook quickly and can become tough if left too long.
- Always taste and adjust the sauce before serving; a pinch of salt or a splash more honey can elevate the dish.
Serving Suggestions
- Serve the shrimp over a bed of fluffy white rice or quinoa to soak up the sauce.
- Pair with steamed asparagus or sautéed bok choy for a vibrant vegetable side.
- Consider a light cucumber salad on the side for a refreshing contrast.
- A chilled glass of Sauvignon Blanc complements the sweet and savory flavors wonderfully.
- Garnish with extra green onion and sesame seeds for added flair before serving.
Enjoy creating this family favorite! It’s one of those delicious dishes that warm the heart and satisfy the soul. Happy cooking!


Leave a Comment