
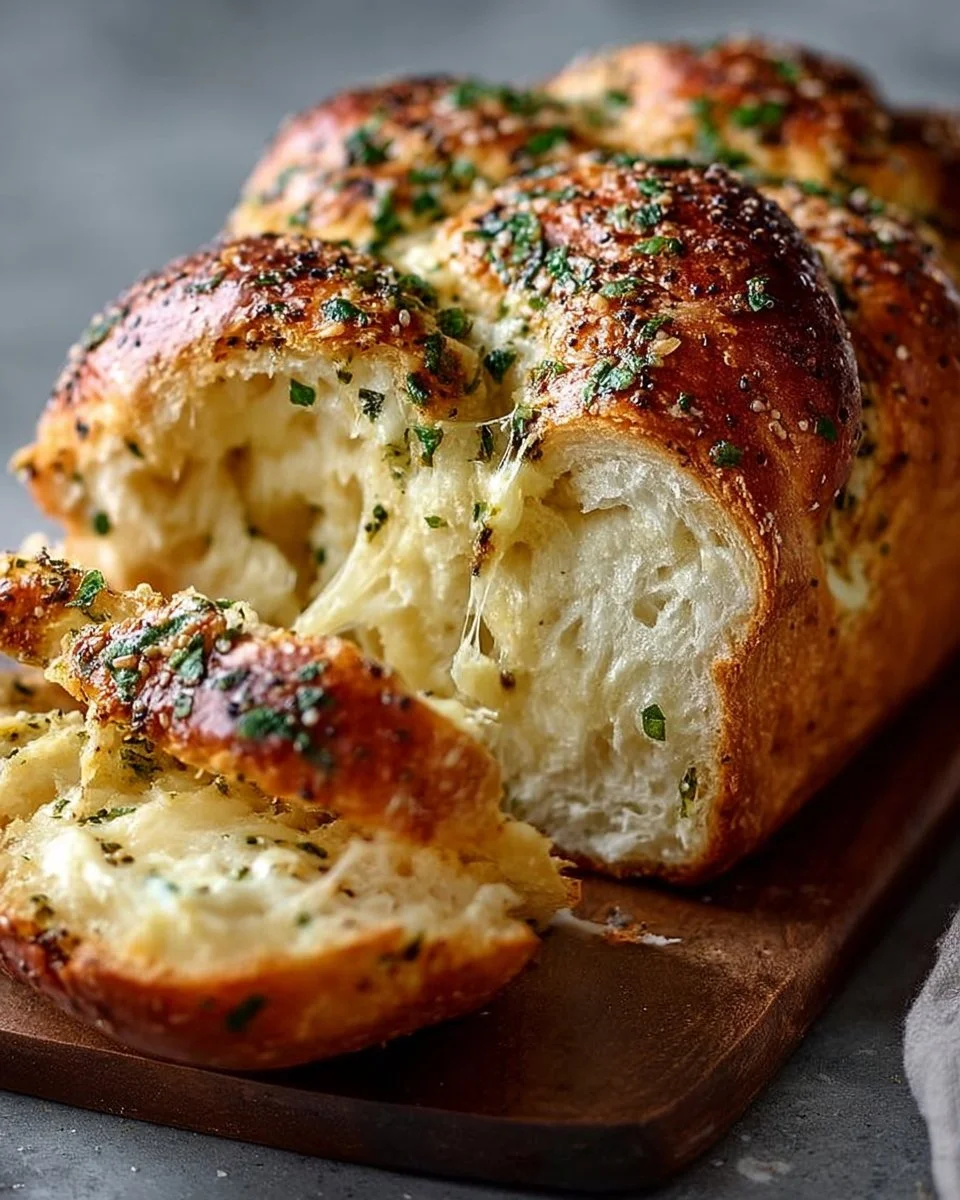
There’s something truly special about the aroma of freshly baked bread wafting through the house, and when it’s Italian Herb and Cheese Bread, it’s pure bliss! With each slice, you’ll discover a beautifully crusty exterior that gives way to a tender, cheesy interior flecked with vibrant herbs. This bread is seriously indulgent and has become a staple in my kitchen for cozy family dinners or a simple way to elevate my weeknight meals.
What I love most about this bread is just how quickly it comes together. It’s perfect for those busy weeknights when I want something homemade but don’t have hours to spare. You can serve it alongside a hearty pasta dish, enjoy it with a salad, or even slice it up for sandwiches. And trust me—if there are any leftovers, they make for an amazing toaster delight the next day!
Why I Love Italian Herb and Cheese Bread
Italian Herb and Cheese Bread hits that sweet spot of being incredibly easy and undeniably delicious. It’s a true winner at my table, where everyone appreciates the blend of cheese and herbs that meld into each bite. Not only is it comforting and satisfying, but it also looks elegant when served, making it a versatile addition to any occasion.
Italian Herb and Cheese Bread Ingredients
The magic of this Italian Herb and Cheese Bread truly lies in the harmonious blend of its ingredients. Each component plays a vital role, creating a delightful experience for your taste buds. Don’t worry about exact measurements just yet; those are all in the recipe card for you!
Essential Components
- 3 CUPS BREAD FLOUR: The backbone of our bread, providing structure and that perfect body.
- 1 CUP WARM WATER: This helps activate the yeast and create a lovely, soft crumb.
- 2 TABLESPOONS OLIVE OIL: Adds flavor and moisture, giving that tender texture we all crave.
- 1 TABLESPOON SUGAR: This little gem helps nourish the yeast and enhances browning.
- 1 TEASPOON SALT: A key player, it balances flavors and strengthens the gluten structure.
- 2 TEASPOONS ITALIAN HERBS: These aromatic herbs bring an enticing flavor that sings of the Italian countryside.
- 1 CUP SHREDDED CHEESE (MOZZARELLA OR PARMESAN): The star of the show that melts into gooey perfection, adding richness and depth.
- 2 TEASPOONS ACTIVE DRY YEAST: Essential for our bread to rise and develop that airy texture we love.
Need a Swap?
Want to switch things up? If you’re out of bread flour, you can use all-purpose flour in a pinch, though it won’t provide quite the same chewy quality. For the herbs, feel free to experiment—try adding dried oregano or basil for a different twist. Don’t have active dry yeast? You can use instant yeast instead; just toss it right in with the flour.
And here’s a quick tip: If you’re short on time, you can prepare the dough the night before, let it rise in the fridge, and bake it fresh in the morning!
Kitchen Tools You’ll Need
- Bread machine (or mixing bowl if doing it by hand)
- Measuring cups and spoons
- Mixing spoon or dough whisk
- Loaf pan (or parchment paper if shaping freeform)
- Clean kitchen towel
- Cooling rack
How to Make Italian Herb and Cheese Bread
Let’s dive into creating this wonderfully aromatic Italian Herb and Cheese Bread. I’ve broken down the process into simple steps. Follow along, and you’ll have a delicious loaf in no time. We’re aiming for a beautifully golden crust and a soft, flavorful inside!
Add Ingredients to Your Bread Machine
First, gather all your ingredients and add them to your bread machine, making sure to follow the order recommended by the manufacturer. If you’re mixing by hand, combine the dry ingredients in one bowl and the wet in another before mixing. This step is key for even distribution!
Select the Right Setting
Next, choose the ‘Basic’ or ‘Italian’ bread setting on your bread machine. This ensures the timing and temperature are perfect for our flavor-packed loaf. If you’re using a stand mixer, knead the dough until it becomes smooth and elastic.
Let the Machine Work Its Magic
Now, start your machine and let it do all the work as it mixes, kneads, and rises your dough. You’ll want to marvel at how your kitchen begins to fill with that enticing bread aroma. This stage usually takes a couple of hours, but it’s worth it!
Cool Before Slicing
Once the baking cycle completes, remove the bread from the machine or pan and let it cool on a rack for at least 15-20 minutes before slicing. This waiting step helps maintain moisture and texture. I know it’s tough, but trust me—you want that perfect slice!
Enjoy the Fruits of Your Labor
Finally, slice your warm, fragrant bread and enjoy it with your favorite meal, or simply slather some butter on a piece. It’s that moment of enjoying something made with love and a little bit of elbow grease that makes cooking so satisfying!
How to Store Italian Herb and Cheese Bread
Leftover Italian Herb and Cheese Bread tends to be just as delightful the next day. You can store it at room temperature in a bread box or wrapped in a clean kitchen towel for 2-3 days. If you want it to last longer, pop it in the fridge in an airtight container, where it will stay fresh for about 3-4 days. Freezing works beautifully too; just wrap it tightly and it’ll be good for 2-3 months. To enjoy it later, let it thaw at room temperature and reheat in the oven for that fresh-baked vibe.
Tips for Success
- Use fresh herbs for the best flavor if you have them—dried ones are great, but fresh elevates the bread!
- Don’t skip the cooling process; it helps improve texture before slicing.
- If mixing by hand, make sure to knead well—about 10 minutes for a good structure.
- Consider adding extra cheese on top just before baking for a lovely, bubbly finish.
Serving Suggestions
- Pair with a vibrant garden salad for a delightful meal.
- Serve alongside marinara sauce for a fun dipping option.
- Enjoy with a glass of red wine for that authentic Italian dining experience.
- For a simple snack, butter a slice and serve with fresh herbs on top.
- Create delicious sandwiches with your favorite deli meats or veggies!
Now, I can’t wait for you to try this Italian Herb and Cheese Bread! Each bite is a warm hug, and I guarantee it’ll become a cherished recipe in your collection. Happy baking and enjoy!


Leave a Comment